


Blog
How to Make Perfect Homemade Crepes (8 Ingredients)

Learning how to make homemade crepes is much easier than you might think. These classic French-style pancakes are incredibly thin, buttery, and delicate, yet the batter comes together in minutes with just 8 basic ingredients. No specialty crepe pan required—a regular skillet works beautifully. Whether you’re making sweet crepes with berries and whipped cream or savory crepes filled with meat, cheese, or vegetables, this foolproof recipe produces soft, flexible crepes with lightly crisp edges every time.

I originally published this recipe in 2015 and have since added new photos, a video tutorial, and more helpful success tips.
Have you made crepes before? While they may seem complicated, making restaurant-quality crepes at home is surprisingly simple. Today I’m walking you through the entire process including crucial success tips, the best 8 ingredients to use, why I use a blender, and a multitude of filling ideas.
Consider this your Ultimate Guide to Crepes!
Why You’ll Love These Homemade Crepes
- Thin, tender, and buttery with lightly crisp edges
- Easy blender batter with only 8 ingredients
- No specialty equipment needed
- Perfect for sweet or savory fillings
- Batter can be made ahead
- Freezer-friendly
- Great for breakfast, brunch, dessert, or dinner—really any time!

One reader, Jane, commented: “This recipe is so good and I can’t believe how easy it was to make. I love that I can make the batter the night before and just pour it in the pan in the morning. ★★★★★“
One reader, Auggy, commented: “You guys make the best recipes, I swear. Gave this a shot having never attempted crepes before and they came out AMAZING. I used extremely low heat with a small pan, and used the timing recommended with 2 minutes on the first side and 30 seconds on the flip side. Delicious. ★★★★★“
One reader, Ellie, commented: “This was the first time I had made crepes and they were amazing and really easy. Ever since I have made them every week for a special dinner. Thank you so much! ★★★★★“
What Are Crepes?
Crepes are thin and delicate French-style pancakes made without any leavener. When made correctly, they’re as thin as lace with irresistible buttery crisp edges. Crepes are popular at restaurants, farmers’ markets, and I’ve even seen crepe stations at wedding receptions! Though they’re usually a breakfast or brunch option, crepes are welcome any time of day, including dinner or dessert. Filled with anything from whipped cream and berries to meat and vegetables, crepes aren’t picky about when you enjoy them. 😉
Unlike American pancakes, crepes don’t contain baking powder or baking soda. Instead of rising and puffing up while they cook, they stay thin, tender, and flexible—perfect for folding or rolling around sweet or savory fillings. Their neutral flavor makes them one of the most versatile recipes you can master, equally suited for breakfast, brunch, lunch, dinner, or dessert.
Crepe recipes vary, but most include flour, liquid (milk and/or water), and salt. Restaurants usually make them with a specialty pan, but a regular skillet works in any home kitchen.
Why are they a favorite? Crepes are popular because their versatility makes them FUN to eat. Rolled up or folded, you can stuff and top them with virtually anything. Unlimited options!
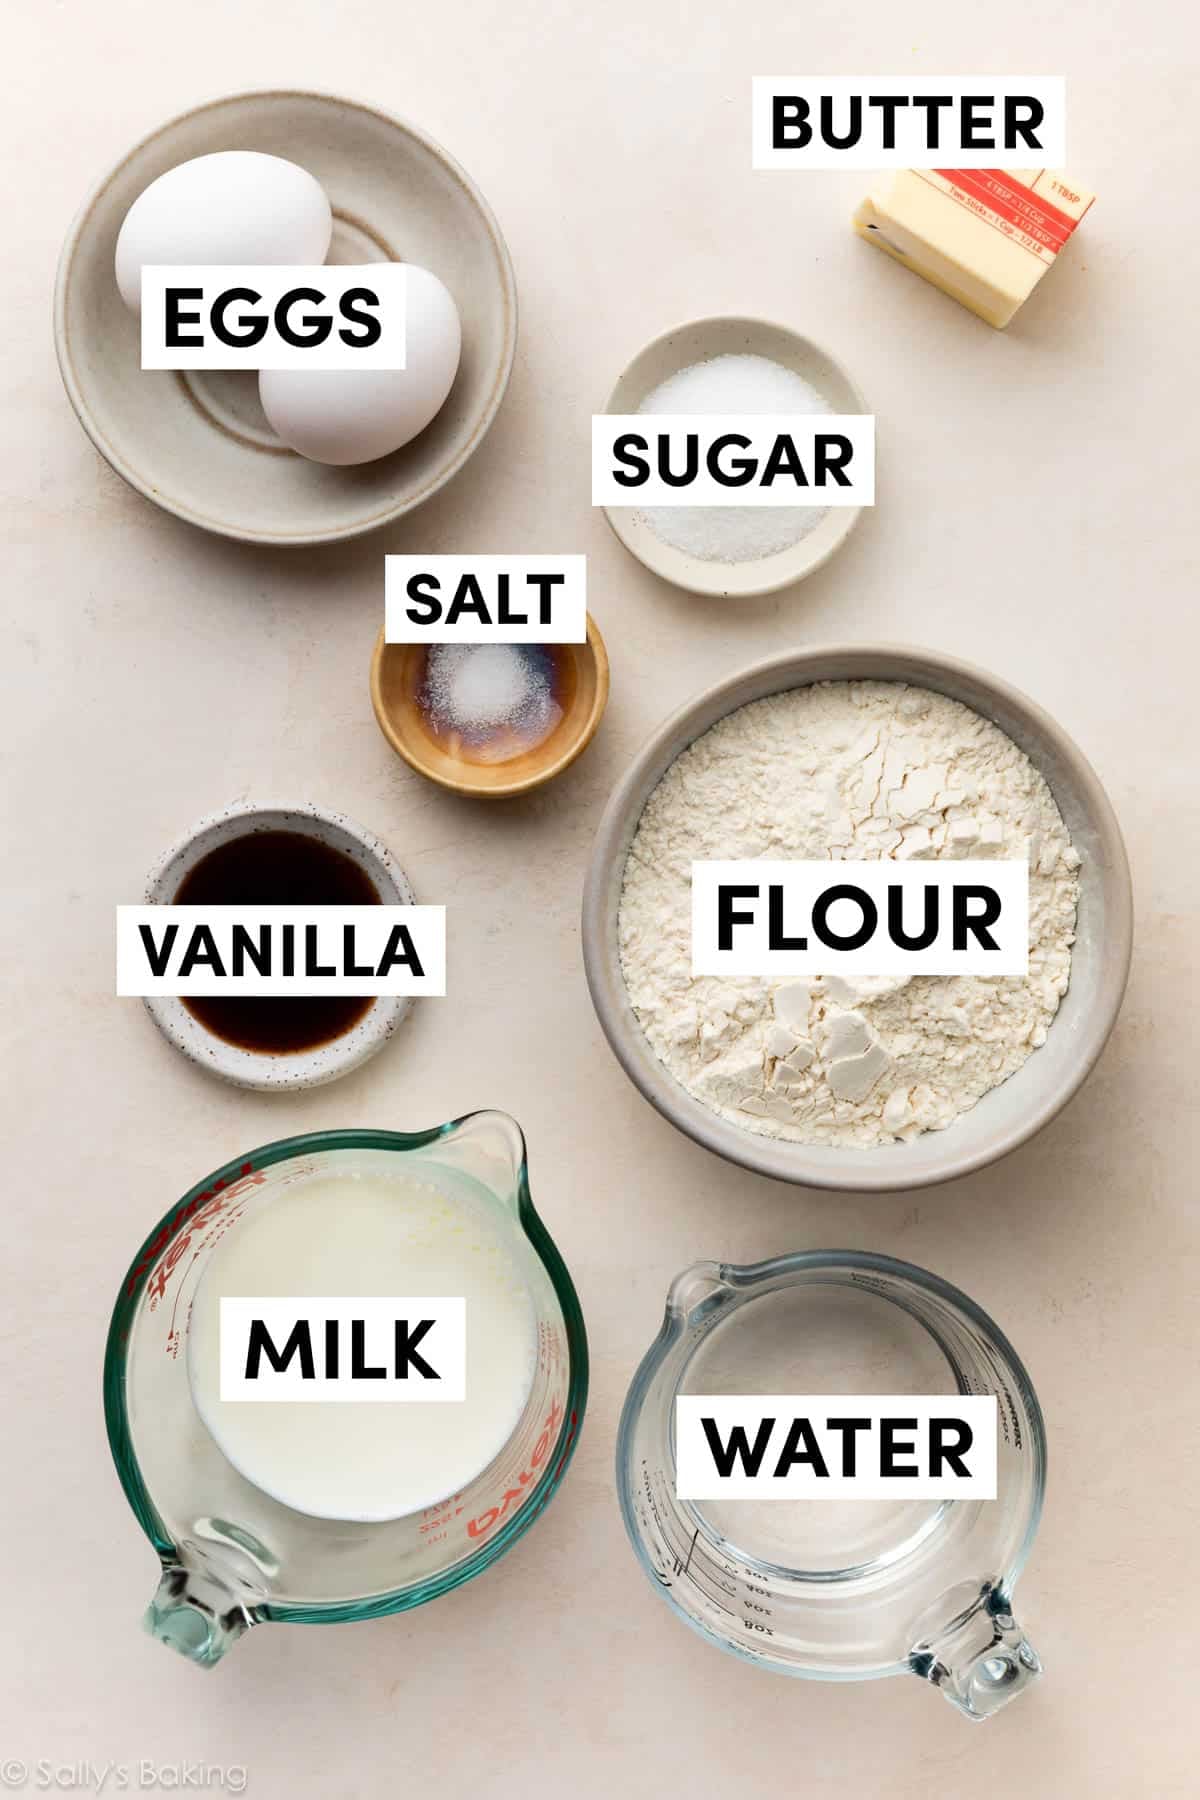
8 Simple Ingredients
The recipe is written out below, but it’s important to understand why each ingredient is used. This is a delicate batter, so substitutions aren’t recommended.
- Unsalted Butter: Adds flavor and richness, and creates those signature lightly crisp edges. Have extra butter handy for the skillet.
- All-Purpose Flour: Flour provides structure while keeping the crepes tender. I haven’t tried any gluten-free alternatives, but let me know if you do!
- Granulated Sugar: These are very lightly sweetened; you only need 1 Tablespoon of sugar for the whole batch.
- Salt: For flavor.
- Milk & Water: Crepe batter needs liquid. For the best texture, use a mix of water and whole milk. Water helps create an extra-light, delicate texture that spreads easily in the pan. Whole milk adds richness and flavor, and the lactose assists in browning. Lower-fat or nondairy milk work, but whole milk produces the best result.
- Eggs: Provide structure and flexibility so the crepes fold without tearing.
- Vanilla Extract: Adds flavor—you’ll definitely smell the vanilla as you cook these on the stove! Feel free to leave it out if you make savory-style crepes.
By themselves, crepes aren’t heavily flavored at all. That’s why the texture is crucial (keep them thin!).
Overview: How to Make Crepes
Combine all ingredients in a blender: Met the butter and cool it for a few minutes so it doesn’t scramble the eggs. Then add the cooled melted butter and all the remaining ingredients into a blender. A blender works WONDERFULLY to smooth out the batter because it cuts that flour perfectly into all the wet ingredients. If you don’t have a blender, just use a mixing bowl and whisk. A blender is key when making this Dutch baby pancake recipe, too.
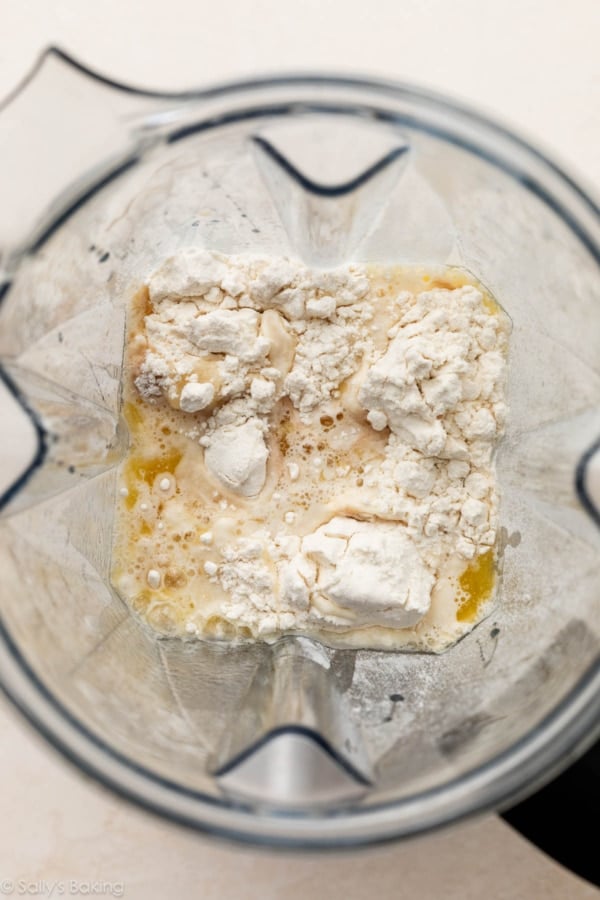
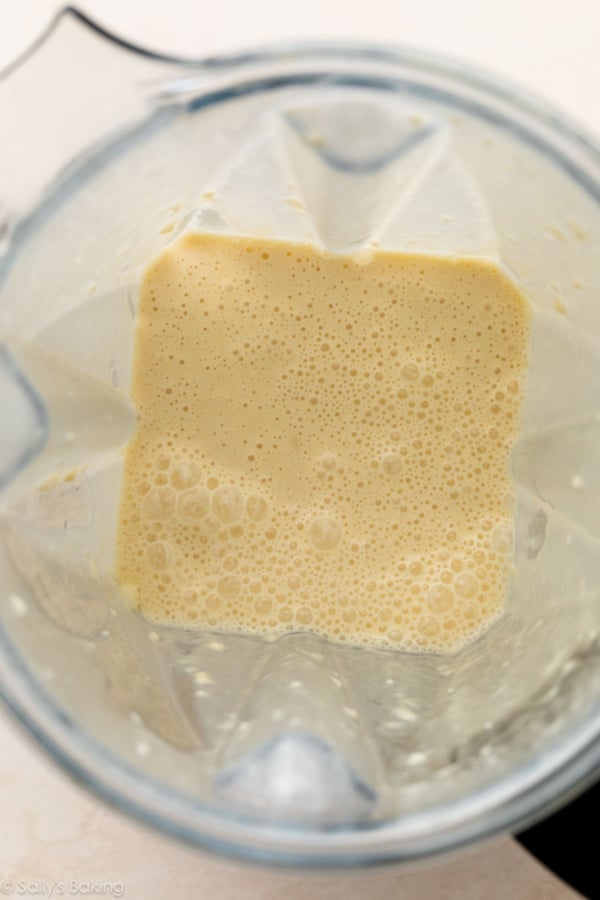
Chill the batter: Chill the crepe batter for at least 30–60 minutes before cooking it. This time in the refrigerator is crucial to the taste, texture, and success of your crepes. Use this time to clean up and get your skillet ready. You can even chill the batter overnight so it’s ready to cook the next day.
Butter & heat a small skillet: Generously butter the pan and keep butter nearby for greasing the pan between each crepe, too. You can certainly use a specialty crepe pan, but I find a small 8-inch skillet works perfectly at home. I recently started using this crepe pan and love it. If you don’t have a small skillet, use a larger one, but make sure you keep the crepes THIN.
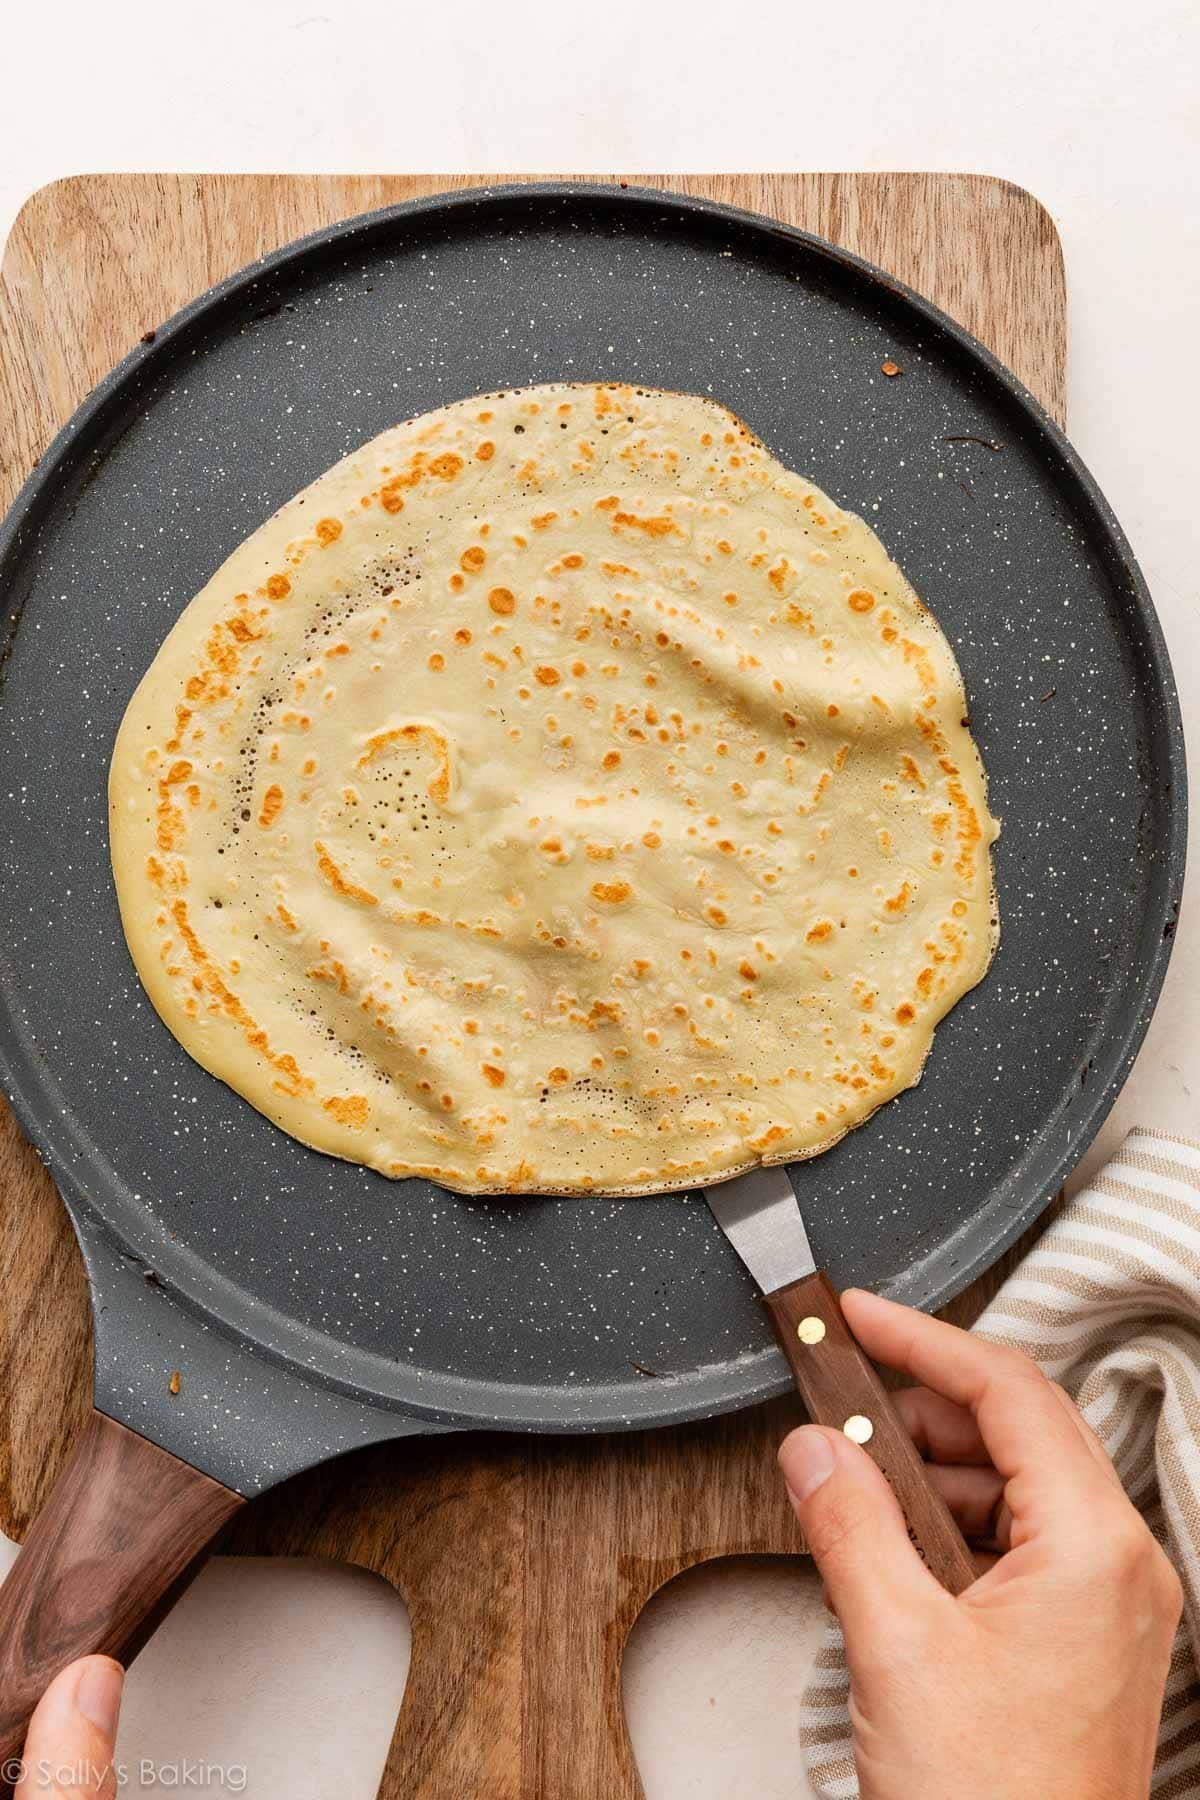
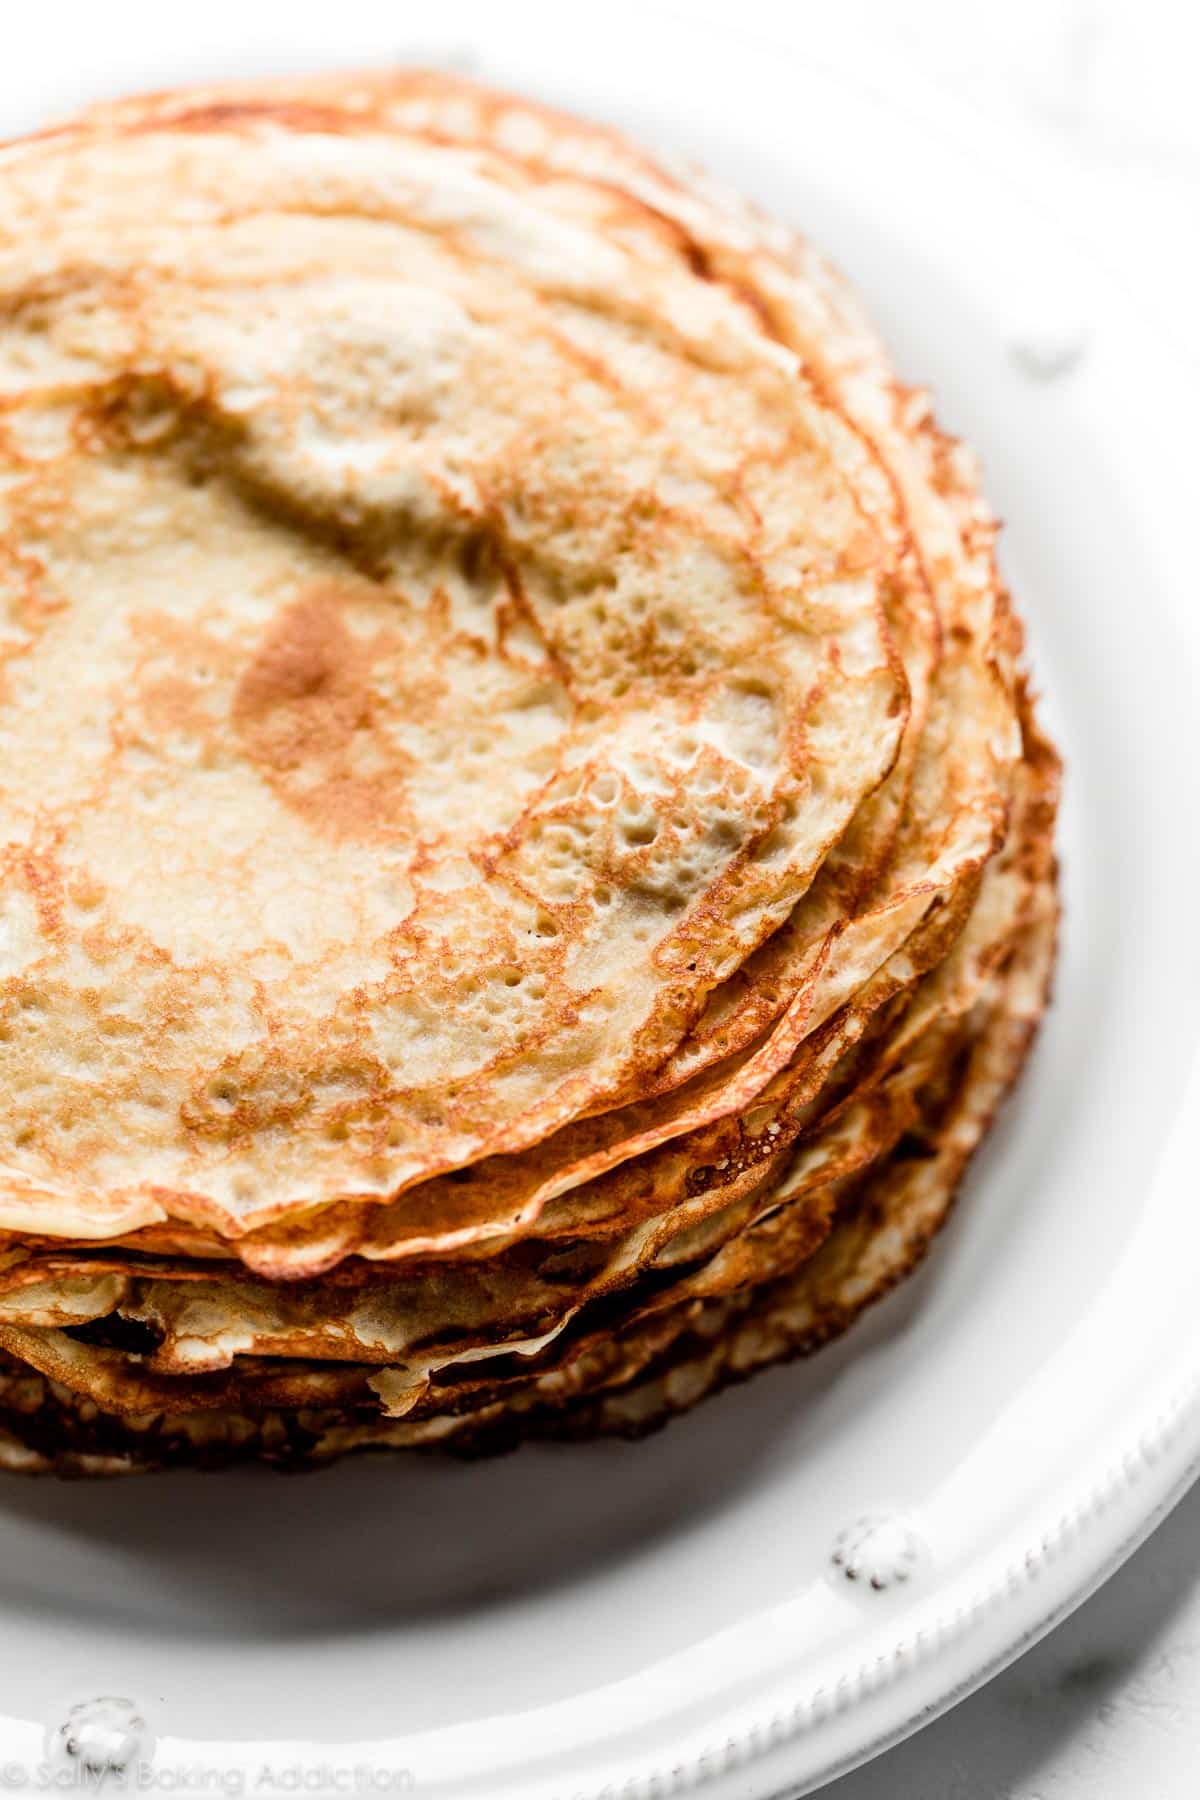
Cook crepes one at a time: The longest part of this recipe is standing over the stove and cooking them one at a time over medium heat. Use only 3–4 Tablespoons of batter per crepe. (I usually use 3 Tablespoons.) The less you use and the larger you stretch the crepe, the thinner they’ll be. As you can see in my video tutorial, I twirl the pan so the batter stretches as far as it can go. If you don’t do this, your crepes will be pretty thick and taste more like tortillas. Still delicious, but a very different texture!
Flip the crepe over and cook the other side, too.
Why Do Crepe Batters Need to Rest?
Resting the batter gives the flour time to fully hydrate and allows air bubbles created during mixing to settle. This produces smoother, more flexible crepes that cook evenly and are much less likely to tear. Even a 30-minute rest makes a noticeable difference.
How to Make Crepes Ahead of Time
You can make the crepe batter up to 1 day in advance. Seal tightly in your blender or pour into a mixing bowl and cover tightly, then cook the crepes the next day.
Crepes are best enjoyed right away, but leftovers keep well in the refrigerator for up to 2 days.
Reheat in the microwave or arrange on a lined baking sheet (they can overlap). Cover with aluminum foil and warm in a 275°F (135°C) oven for 10 minutes. You can also freeze crepes—see instructions below.
Crepes Success Tips
- Chill the batter: I mentioned this above and include it in the written recipe below, but it’s definitely worth repeating. One secret to the BEST crepes is to chill the crepe batter for at least 30–60 minutes and up to 1 day. This time in the refrigerator enhances the batter’s flavor and, more importantly, gives the flour a chance to fully hydrate.
- Butter the pan between each crepe: The best part of crepes is the thin, delicate, and buttery crisp edges. To achieve this, butter the pan between EACH crepe. Sounds like a pain, but just grab a stick of butter and coat the pan before adding more batter. You won’t regret it.
- Twirl the pan: Pour the batter into the center of the hot and buttered pan. Lift the pan up and twirl it so the batter stretches as far out as it can go. (The thinner the crepe, the better texture it has—trust me.) This crucial technique is much easier than it sounds and you can watch me do it in the video tutorial.
Crepe Fillings & Toppings
Think of crepes as a blank canvas for your favorite fillings and toppings. I love serving them warm with homemade whipped cream and fresh berries. A squeeze of fresh lemon juice and a dusting of sugar is a classic way to enjoy them, too. With such a simple accompaniment, the crepes themselves truly shine.
Plenty more crepe filling inspiration for you:
Sweet Crepe Filling Ideas
Savory Crepe Filling Ideas
- Ham & Swiss/Gruyère Cheese with Dijon Mustard
- Scrambled Eggs, Avocado, & Sharp White Cheddar with Hollandaise Sauce
- Smoked Salmon, Cream Cheese, & Chives
- Bacon, Scrambled Eggs, & Green Onions
- Rotisserie Chicken, Steamed Broccoli, & Cheddar
- Fresh Mozzarella, Basil, & Sliced Tomato with a Drizzle of Balsamic Glaze
- Prosciutto, Steamed Asparagus, & Goat Cheese
- Homemade Pesto & Sautéed Veggies (Like Mushrooms, Spinach, Peppers, & Zucchini)
- Soft Goat Cheese, Fig Jam, & Caramelized Onions + a Sprinkle of Chopped Walnuts
Or try the always delicious Crepes Suzette!

They’re likely overcooked. Crepes only need about 1–2 minutes on the first side and about 30 seconds after flipping.
The batter may not have rested long enough, or they may have been flipped before the first side has fully set.
You may have used too much batter, and/or the batter wasn’t spread out thin enough. Use only 3-4 Tablespoons of batter and immediately swirl it across the entire pan.
A blender solves this quickly. If you are whisking the batter by hand, you can strain it through a sieve before chilling.
Once you learn how to make crepes from scratch, you’ll find yourself reaching for this recipe again and again. They’re simple enough for an everyday breakfast yet elegant enough for brunch, dessert, or special occasions. Fill them with fresh fruit and whipped cream, savory eggs and cheese, or whatever sounds good that day—the possibilities are nearly endless.
Can’t get enough? You can also make a crepe cake!
Print
Description
This basic crepe recipe is perfect for your favorite crepe fillings and toppings. Before beginning, watch the helpful video tutorial and read the instructions and recipe notes below.
- Review my success tips and watch the video tutorial below before beginning.
- Melt 3 Tablespoons of butter in the microwave or on the stove. Cool for about 5 minutes before using in the next step. The remaining butter is for the skillet.
- Combine the cooled melted butter, flour, sugar, salt, milk, water, eggs, and vanilla in a blender or large food processor. If you don’t have a blender or food processor, use a large mixing bowl and whisk by hand. Blend on medium-high speed for 20–30 seconds until everything is combined. The mixture will be silky-smooth and the consistency of cream. Cover the blender tightly or pour into a medium bowl, cover tightly, and chill in the refrigerator for 30–60 minutes and up to 1 day. (After refrigerating, if the batter looks separated, give it a quick stir before cooking in the next step.)
- Cook the crepes: Use the remaining butter for greasing the pan between each crepe. Place an 8-inch skillet or specialty crepe pan like this over medium heat and generously grease it with some of the reserved butter. If you don’t have a skillet this size, use a larger one, but make sure you keep the crepes thin.
- Once the skillet is hot, pour 3–4 Tablespoons (closer to 3 is best) of batter into the center of the pan. Tilt/twirl the pan so the batter stretches as far as it will go. The thinner the crepe, the better the texture. Cook for 1–2 minutes, then flip as soon as the bottom is set. Don’t wait too long to flip crepes or else they will taste rubbery. I find a small offset spatula helpful for flipping. Cook the other side for 30 seconds until set. Transfer the cooked crepe to a large plate and repeat with the remaining batter, making sure to butter the pan between each crepe. If desired, separate each crepe with parchment paper so they do not stick together. If you’re using enough butter in your pan, though, the crepes shouldn’t stick.
- Fill the crepes. I love serving them warm, but they’re excellent at room temperature too. See my filling suggestions above this recipe or in the recipe Notes below. Place a few spoonfuls of your filling ingredient(s) in the center of the crepe. Fold both sides over the filling. Crepes are delicious with toppings, too, such as a drizzle of melted chocolate or melted peanut butter, or a dusting of confectioners’ sugar + a squeeze of fresh lemon. Or try a savory sauce like pesto or hollandaise.
- Leftover unfilled crepes remain fresh in an airtight container in the refrigerator for 1 day or in the freezer for 1 month. Freeze each between small sheets of parchment paper so they don’t stick. (I usually layer them with parchment and freeze in a large zip-top bag.) Thaw at room temperature before filling/enjoying. See reheating instructions in the recipe Notes below.
Notes
- Make-Ahead Instructions: Batter can be made the night before. Seal tightly in your blender or pour into a mixing bowl and cover tightly, then prepare crepes the next day. Crepes are best enjoyed right away, but you can make a batch and store in the refrigerator for up to 1–2 days. Reheat in the microwave or arrange on a lined baking sheet (they can overlap). Cover with aluminum foil and warm in a 275°F (135°C) degree oven for 5–10 minutes.
- Special Tools (affiliate links): Food Processor, Blender (what I use), or Large Mixing Bowl and Whisk | Small 8-inch Skillet or Specialty Crepe Pan | Silicone Spatula | Small Offset Spatula
- Keep Warm as You Cook: The radiant heat from each crepe piled on top of one another keeps them all warm as you cook the remaining batter. If the crepes have gotten cold, place a water-moistened damp paper towel over the plate of crepes and microwave for 30 seconds. I find keeping them in a warm oven the entire time you’re cooking the rest quickly dries them out.
- Crepe Fillings: My pictured crepes are filled with lightly sweetened orange whipped cream. To make the whipped cream, add 1 Tablespoon fresh orange juice and, if desired, 1 Tablespoon orange liqueur to my whipped cream recipe. Just add it along with the heavy cream—whipped cream recipe instructions remain the same. Serve with fresh berries, orange zest, and a dusting of confectioners’ sugar on top. Or use any fillings/toppings you desire. See a list of suggestions above this recipe.
- Milk: I prefer whole milk in the crepe batter. For a richer-tasting crepe, half-and-half or heavy cream work too. 2% is OK, but I don’t recommend 1% or nonfat milks. Any low-fat or full-fat nondairy milk works too.
- Savory Crepes: The recipe as written will work for savory crepes, but I usually leave out the vanilla extract and add a pinch of ground black pepper. Feel free to add a Tablespoon of your favorite dried herbs to the batter, too.
- Adapted from Kraft