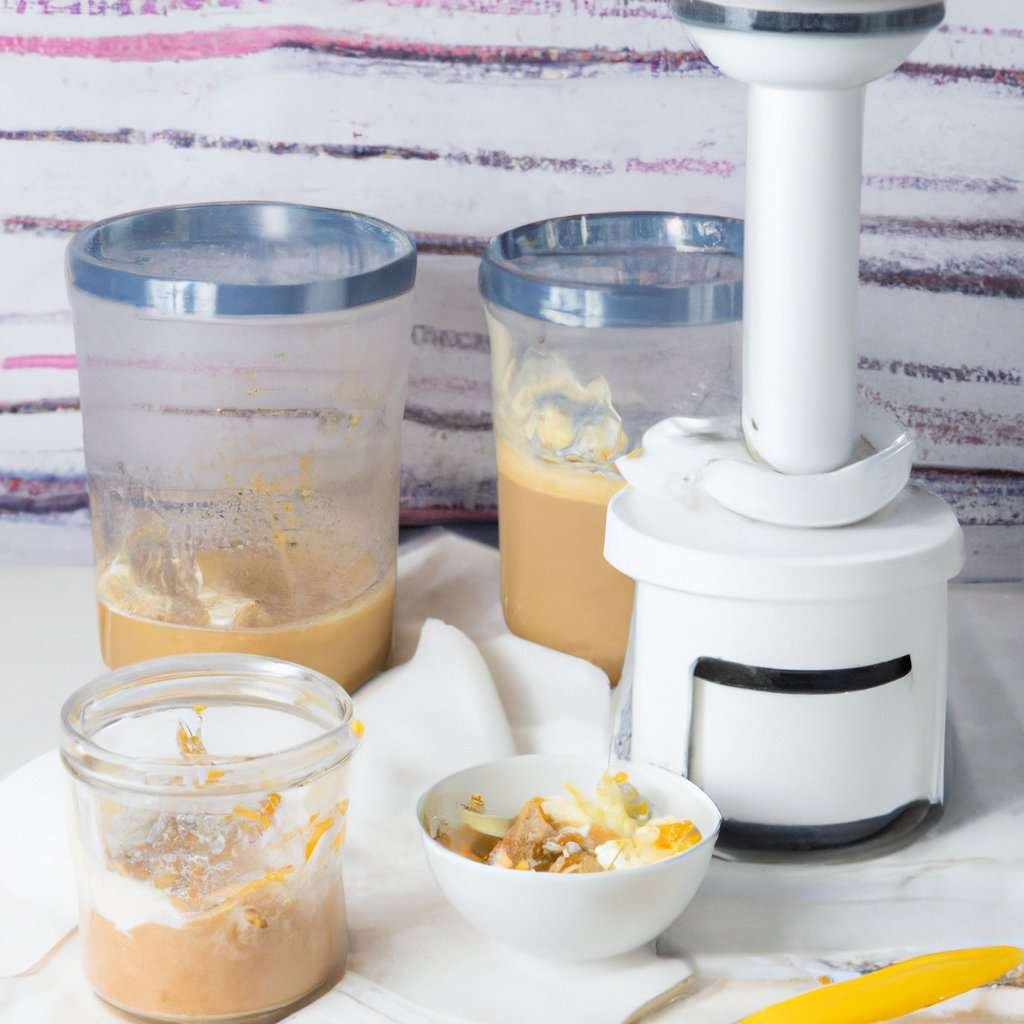
14- Best Food Processor Homemade Nut Butter

nutritious varieties
The food processor has revolutionized the way we make homemade nut butter, making it more convenient and delicious than ever before. With its powerful blades and versatile functions, the food processor allows us to create a variety of nutritious nut butter varieties right in our own kitchen.
Gone are the days of spending hours grinding nuts by hand or relying on store-bought options filled with additives and preservatives. The food processor effortlessly transforms raw nuts into smooth and creamy spreads, giving us full control over the ingredients and flavors we desire.
Whether you prefer classic peanut butter, rich almond butter, or adventurous combinations like cashew coconut or hazelnut chocolate, the food processor can handle it all. Simply add your choice of nuts to the processor, blend until smooth, and customize with additional ingredients such as honey, cinnamon, or sea salt to enhance the flavor profile.
Not only does making homemade nut butter with a food processor offer convenience and deliciousness, but it also provides numerous health benefits. By using high-quality nuts without added sugars or oils, you can ensure that your nut butter is packed with essential nutrients such as healthy fats, protein, fiber, vitamins, and minerals.
So why settle for store-bought options when you can easily create your own nutritious and flavorful nut butter at home? Embrace the convenience of the food processor in making homemade nut butter that will satisfy your taste buds while nourishing your body.
—
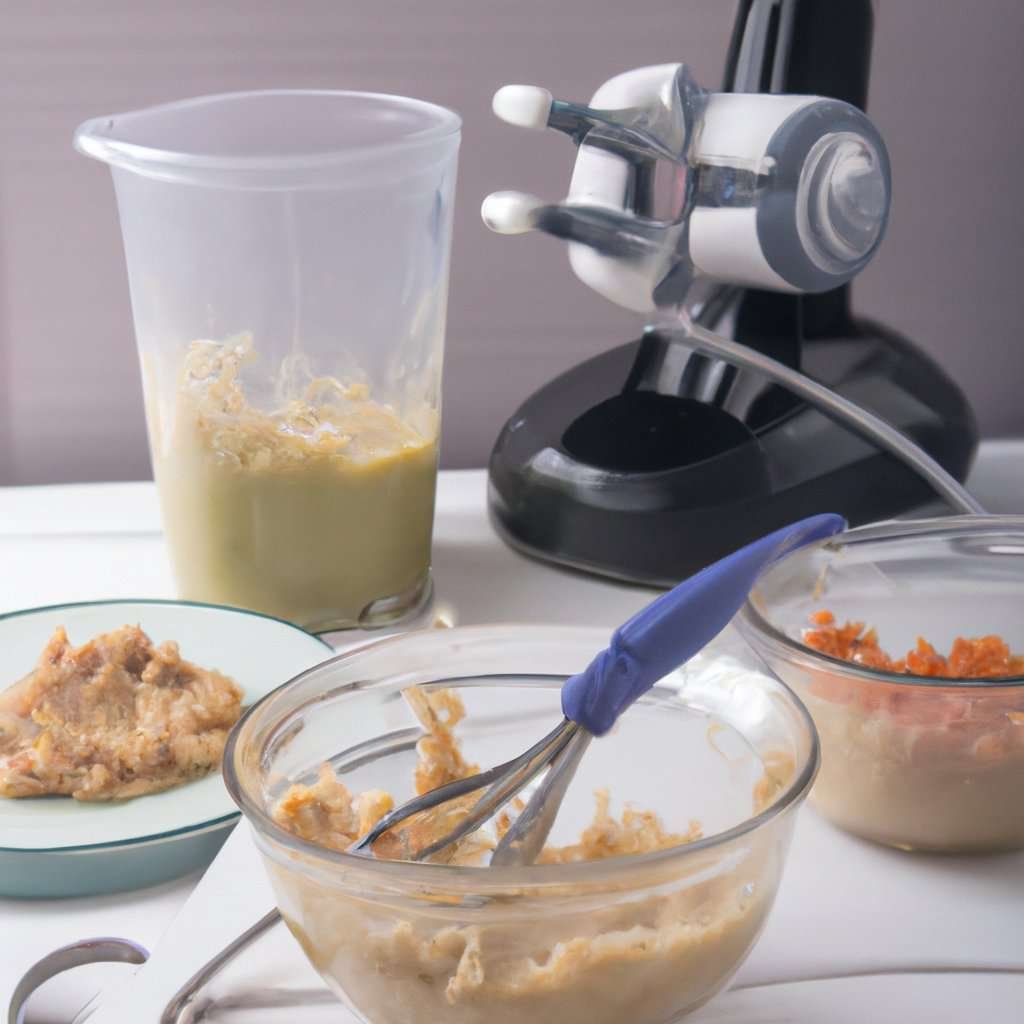
Making homemade nut butter has never been easier, thanks to the convenience of a food processor. With just a few simple steps, you can transform your favorite nuts into a delicious and nutritious spread that will elevate your snacking experience.
The food processor is an essential tool for any kitchen enthusiast looking to create their own nut butter varieties. Its powerful blades effortlessly grind the nuts into a smooth and creamy consistency, allowing you to customize the flavors according to your taste preferences.
One of the greatest advantages of using a food processor is the ability to experiment with different combinations of nuts. Whether you prefer classic almond butter or crave the rich flavor of cashews, the food processor allows you to blend various nuts together or create single-nut butters with ease.
Not only does making homemade nut butter in a food processor provide convenience, but it also ensures that you have full control over the ingredients used. You can choose to add sweeteners like honey or maple syrup for a touch of sweetness, or incorporate spices like cinnamon or vanilla extract for an extra burst of flavor.
Moreover, by making your own nut butter at home, you can avoid any additives or preservatives commonly found in store-bought varieties. This means that not only are you enjoying a delicious spread, but you are also nourishing your body with wholesome and natural ingredients.
In conclusion, using a food processor to make homemade nut butter offers both convenience and creativity. It allows you to experiment with different nuts and flavors while ensuring that your spread is made from high-quality ingredients. So why settle for store-bought when you can easily whip up deliciously nutritious varieties right in your own kitchen?
—
Food processors have revolutionized the way we make homemade nut butter, offering unparalleled convenience and delicious results. With just a few simple steps, you can transform a variety of nuts into creamy spreads that are not only tasty but also packed with essential nutrients.
Gone are the days of spending hours manually grinding nuts to achieve the perfect consistency. A food processor effortlessly breaks down the nuts, releasing their natural oils and creating a smooth and velvety texture. Whether you prefer almond butter, cashew butter, or even hazelnut butter, a food processor can handle it all with ease.
The convenience of using a food processor for making nut butter extends beyond just saving time. It allows you to experiment with different flavors and combinations, adding your favorite ingredients like honey, cinnamon, or even chocolate to create unique and personalized varieties. The possibilities are endless when it comes to exploring new taste sensations.
Additionally, making your own nut butter at home ensures that you have complete control over the ingredients used. You can choose high-quality nuts without any additives or preservatives, ensuring a wholesome and nutritious final product. This is especially beneficial for those with dietary restrictions or allergies who need to carefully monitor what goes into their food.
In conclusion, using a food processor for making homemade nut butter offers both convenience and creativity in the kitchen. It allows you to effortlessly create nutritious spreads bursting with flavor while maintaining control over the ingredients used. Embrace this innovative tool and elevate your culinary experience by exploring the vast world of homemade nut butter varieties!
—
In today’s fast-paced world, finding convenient ways to make nutritious and delicious homemade nut butter is a game-changer. That’s where the food processor comes in, revolutionizing the way we create our favorite spreads.
Gone are the days of spending hours laboring over a mortar and pestle or struggling with clunky kitchen appliances. The food processor offers unparalleled convenience, effortlessly transforming nuts into smooth and creamy butter with just a push of a button.
Not only does the food processor save us time and effort, but it also allows us to explore an array of flavors and varieties. From classic almond butter to exotic macadamia or cashew butter, the possibilities are endless. With this versatile appliance, you can experiment with different combinations of nuts, adding your favorite spices or sweeteners to create unique and personalized blends.
The beauty of making nut butter at home lies in its nutritional value. By using fresh, high-quality ingredients without any additives or preservatives, you have full control over what goes into your spreads. You can choose organic nuts for an extra health boost or opt for roasted nuts for a richer flavor profile.
Whether you’re looking to enhance your breakfast routine by spreading homemade nut butter on toast or want to incorporate it into baking recipes for added richness and depth of flavor, the food processor is your ultimate ally in achieving that perfect consistency every time.
So why settle for store-bought options when you can easily create your own nutritious varieties at home? Let the convenience of the food processor inspire you to embark on a culinary adventure filled with wholesome goodness and delectable flavors. Your taste buds will thank you!
—
In today’s health-conscious world, homemade nut butter has become a popular choice for those seeking a nutritious and delicious alternative to store-bought options. With the convenience of a food processor, creating your own nut butter has never been easier or more satisfying.
Gone are the days of spending excessive amounts of time and effort manually grinding nuts to achieve that smooth and creamy consistency. The food processor takes care of the hard work for you, effortlessly transforming raw nuts into delectable spreads bursting with flavor.
Not only does using a food processor save you time and effort, but it also allows you to experiment with an array of nutritious varieties. From classic almond butter to rich and indulgent chocolate hazelnut spread, the possibilities are endless. You can even mix different nuts together for unique flavor combinations that cater to your taste preferences.
By making your own nut butter at home, you have full control over the ingredients used. No additives or preservatives – just pure, wholesome goodness that nourishes your body. You can customize your creations by adding a touch of sweetness with honey or maple syrup or enhancing the flavor profile with spices like cinnamon or vanilla extract.
The convenience offered by a food processor in creating homemade nut butter is unparalleled. Whether you’re spreading it on toast, incorporating it into recipes, or simply enjoying it by the spoonful, this nutritious alternative will leave you craving more. So why settle for store-bought when you can easily whip up your own deliciously satisfying varieties at home?
Three Awesome Recieps
Step 1: Almond Butter
Ingredients:
– 2 cups raw almonds
Instructions:
1. Place the raw almonds in the food processor.
2. Process the almonds on high speed for about 5 minutes, or until they start to break down into a crumbly texture.
3. Stop the food processor and scrape down the sides with a spatula to ensure even blending.
4. Continue processing for another 5-10 minutes, or until the almonds release their natural oils and turn into a creamy consistency.
5. If desired, add a pinch of salt or sweetener (such as honey or maple syrup) to taste and blend for an additional minute.
6. Transfer the almond butter to an airtight container and store it in the refrigerator.
Step 2: Cashew Butter
Ingredients:
– 2 cups raw cashews
Instructions:
1. Add the raw cashews to the food processor.
2. Process on high speed for about 5 minutes, or until they start to break down into a crumbly texture.
3. Stop and scrape down the sides of the food processor with a spatula.
4. Continue processing for another 5-10 minutes, or until the cashews become smooth and creamy.
5. Optional: Add a pinch of salt, vanilla extract, or cinnamon for extra flavor and blend for an additional minute.
6. Transfer your homemade cashew butter into an airtight container and store it in the refrigerator.
Step 3: Peanut Butter
Ingredients:
– 2 cups roasted peanuts
Instructions:
1. Place roasted peanuts in your food processor.
2. Process on high speed for about 3-4 minutes until they are broken down into small pieces resembling coarse crumbs.
3. Stop and scrape down any peanut bits stuck to the sides of your food processor bowl using a spatula.
4.Continue processing for another few minutes until you achieve a smooth and creamy consistency.
5. Optional: Add a pinch of salt or honey for taste and blend for an additional minute.
6. Transfer your homemade peanut butter into a jar or container and store it in the refrigerator.
Enjoy your freshly made nut butters, packed with nutrients and ready to be spread on toast, used in recipes, or enjoyed straight from the spoon!
—Second Version of receipe
Recipe 1: Classic Peanut Butter
Step 1: Gather your ingredients – 2 cups of roasted peanuts and a pinch of salt.
Step 2: Place the roasted peanuts into the food processor.
Step 3: Secure the lid tightly and turn on the food processor.
Step 4: Process the peanuts for about 2-3 minutes until they start to break down.
Step 5: Stop and scrape down the sides of the bowl to ensure even processing.
Step 6: Continue processing for another few minutes until you reach your desired consistency. If you prefer chunky peanut butter, process for a shorter time; if you prefer smooth peanut butter, process longer.
Step 7: Add a pinch of salt to enhance the flavor and continue processing for another minute or until well combined.
Step 8: Taste and adjust seasoning if necessary. You can add honey or any other sweetener at this stage if desired.
Step 9: Transfer your homemade peanut butter into an airtight container and store it in the refrigerator.
Recipe 2: Almond Cashew Butter
Step 1: Gather your ingredients – equal parts of almonds and cashews (e.g., one cup each) with a pinch of sea salt.
Step 2: Add both nuts to the food processor bowl, ensuring it is securely closed with its lid in place.
Step 3: Turn on the food processor and let it run for about five minutes or until you see that nuts are starting to break down into a crumbly texture.
Step 4: Pause, scrape down any nut pieces stuck on the sides, then continue processing for another three to five minutes. The mixture should start clumping together at this point.
Step 5: Add a pinch of sea salt to taste. You can also add honey or maple syrup if you prefer some sweetness in your nut butter. Blend again until well combined, usually around one to two minutes.
Step 6: Taste and adjust the seasoning or sweetness if desired.
Step 7: Transfer your almond cashew butter into a clean, airtight jar or container.
Step 8: Store it in the refrigerator for up to two weeks.
Recipe 3: Hazelnut Chocolate Spread
Step 1: Gather your ingredients – 2 cups of roasted hazelnuts, 1/4 cup of cocoa powder, 1/4 cup of powdered sugar, and a pinch of salt.
Step 2: Place the roasted hazelnuts into the food processor bowl and secure the lid tightly.
Step 3: Process the hazelnuts for about five minutes or until they reach a smooth consistency. You may need to pause occasionally to scrape down any stuck pieces on the sides.
Step 4: Add cocoa powder, powdered sugar, and a pinch of salt into the food processor. Blend again until all ingredients are well combined. This process usually takes another one to two minutes.
Step 5: Taste and adjust sweetness or saltiness according to your preference by adding more powdered sugar or salt if needed. Blend again briefly until fully incorporated.
Step 6: Transfer your homemade hazelnut chocolate spread into an airtight jar or container.
Step 7: Store it in a cool place away from direct sunlight. It can be kept for up to two weeks in the refrigerator.
Enjoy these nutritious homemade nut butters made effortlessly with your food processor!
—
Recipe 1: Classic Peanut Butter
Step 1: Start by gathering the ingredients for your homemade peanut butter. You will need 2 cups of roasted peanuts, 1 tablespoon of honey or maple syrup (optional), and a pinch of salt.
Step 2: Place the roasted peanuts in the food processor and secure the lid.
Step 3: Pulse the peanuts for about 30 seconds to break them down into smaller pieces.
Step 4: Scrape down the sides of the food processor bowl to ensure even blending.
Step 5: Continue processing for another minute or two until you achieve a smooth and creamy consistency. If desired, add honey or maple syrup and salt during this step for added sweetness and flavor.
Step 6: Taste your peanut butter and adjust any seasonings according to your preference. Add more sweetener or salt if needed.
Step 7: Transfer your freshly made peanut butter into a clean jar or container with an airtight lid.
Step 8: Store it in the refrigerator for up to two weeks, although it’s likely to be enjoyed long before then!
Step 9: Spread this classic homemade peanut butter on toast, use it as a dip, or incorporate it into various recipes like cookies and smoothies.
Recipe 2: Almond Butter with Vanilla
Step 1: Gather your ingredients – you’ll need around two cups of raw almonds, one teaspoon of vanilla extract, one tablespoon of coconut oil (optional), and a pinch of salt.
Step 2: Add the raw almonds to your food processor bowl and secure the lid tightly.
Step 3: Pulse the almonds for about one minute until they are finely ground. Scrape down any almond bits stuck on the sides if necessary.
Step 4: Add vanilla extract, coconut oil (if using), and salt to enhance flavors. Securely place back on lid after adding these ingredients.
Step 5: Process the mixture for another 3-4 minutes until it reaches a smooth and creamy consistency. You might need to scrape down the sides occasionally.
Step 6: Taste the almond butter and adjust any seasonings to your liking. Add more vanilla extract or salt if desired.
Step 7: Transfer your freshly made almond butter into a clean jar or container with an airtight lid.
Step 8: Store it in the refrigerator, where it can last for up to three weeks, although it’s unlikely to stick around that long!
Step 9: Enjoy this delicious almond butter on toast, in smoothies, or as a dip for fruits and vegetables.
Recipe 3: Cashew Butter with Cinnamon
Step 1: Gather your ingredients – you’ll need around two cups of raw cashews, one teaspoon of ground cinnamon, one tablespoon of coconut oil (optional), and a pinch of salt.
Step 2: Place the raw cashews into your food processor bowl and secure the lid tightly.
Step 3: Pulse the cashews for about one minute until they are finely ground. Scrape down any cashew bits stuck on the sides if necessary.
Step 4: Add ground cinnamon, coconut oil (if using), and salt to enhance flavors. Securely place back on lid after adding these ingredients.
Step 5: Process the mixture for another 3-4 minutes until it reaches a smooth and creamy consistency. You might need to scrape down the sides occasionally.
Step 6: Taste your cashew butter and adjust any seasonings according to your preference. Add more cinnamon or salt if desired.
Step 7: Transfer your freshly made cashew butter into a clean jar or container with an airtight lid.
Step 8: Store it in the refrigerator for up to three weeks, although we doubt it will last that long!
Step 9: Use this delightful cashew butter as a spread on toast, in baking recipes, or even as a unique addition to savory dishes.
useful link for nutbutter making by food processor is below :
https://onepotwellness.com/best-food-processor-for-nut-butter/